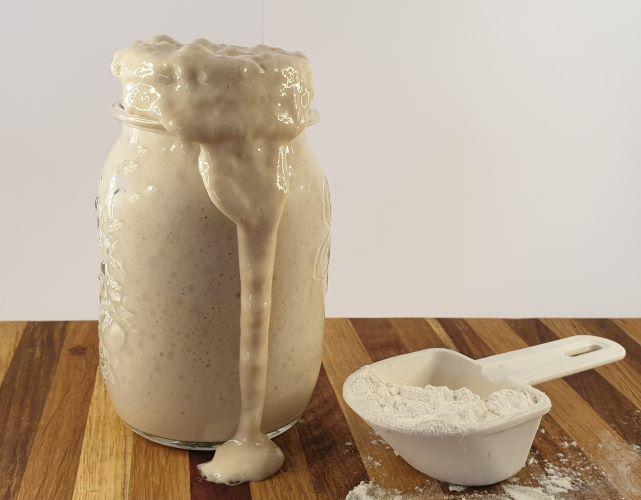
Baking is love made visible
~ Internet image ~
Yes, baking and bread and love are all the same thing really. The mixture of flour, water, salt and yeast to make bread has sustained people for centuries. It’s a natural process that you can be part of. So learning to bake good bread is really about learning to control the natural process. This is what bakers used to do until commercial yeast and baking became the norm. Even though baking bread isn’t difficult, it does take some time to let the natural processes take place. We have therefore become used to buying commercially baked bread made with chemicals to speed up the process. Sourdough baking using a Sourdough Starter is the exact opposite of fast, mass-produced bread. It has become extremely fashionable again and once you get into it you will understand why.
All natural, nothing added
Sourdough bread is made with leaven which in turn is made of flour, water and a culture of natural yeast and bacteria. No commercial yeast is added. It can have a slightly sour taste as the natural yeast ferments the flour and creates lactic and acetic acid. Acetic acid is basically vinegar and therefore sour tasting. The latest trend in sourdough baking is to use a young leaven though. This means the leaven doesn’t have a lot of acid yet although it is active enough the let the dough rise. Some bakers have changed to using the term “naturally leavened” rather than sourdough baking.
Start your starters
So before you can bake a loaf of naturally leavened bread, you have to have a Sourdough Starter. Many people can remember grandmothers and mothers having some form of dough starter in the kitchen with which they baked bread. We make a starter by combining flour and water and let the yeast and bacteria that occur naturally in the world around us create a culture. You can “harvest” this natural occurring yeast and “cultivate” it as a starter. Cultivation means care and maintenance though. Once you have established a natural culture of yeast and bacteria, you have to feed and maintain it. You are to an extent creating a pet for yourself. Luckily there are some tricks which will mean that you can maintain your starter without too much trouble.
What you put in is what you get out
Just a note on flour. Mass-produced flour (such as Snowflake) is milled using machines and bleached to give it a very white appearance. It lacks taste and the chemicals with which it is bleached removes some of the natural properties of the flour. If you want to create a natural culture, your chances for success are much better if you switch to stone-ground unbleached flour. I find Eureka flour to give the best results for bread. I use a mixture of white bread flour and whole-wheat bread flour for my starter and bread. Eureka also makes a brown bread flour, but this is just white bread flour with some bran mixed in – not true whole-wheat bread flour. I do not use all-purpose or cake flour for my bread. Eureka does have all-purpose flour, but I use that for baking cakes and cookies.
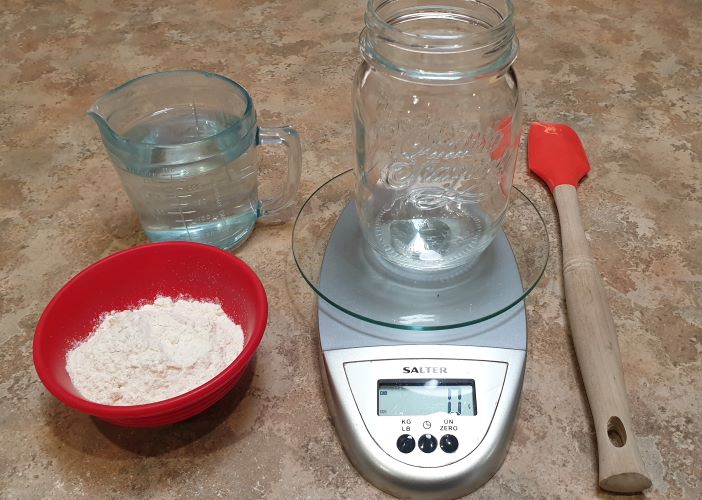
Sourdough Starter
Ingredients
- 50 g whole-wheat flour (you can use white bread flour too, but whole-wheat has germ and bran which helps the culture along)
- 50 g water
Instructions
Creating a culture
- In a medium-sized see-through container such as a glass jar, mix the flour and water until it is a thick batter.
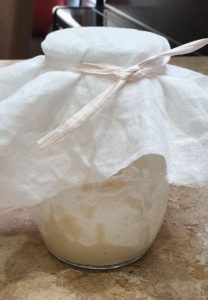
- Cover the container with a kitchen towel or piece of fabric and let it stand in your kitchen in a cool spot (not in direct sunlight) for 2 to 3 days.
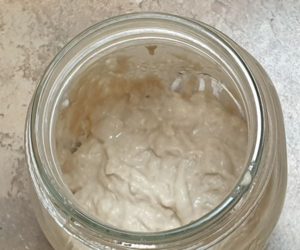
- Check for bubbles in the culture and note the smell. If there is activity the culture will smell quite sharply like stinky cheese. If there are no bubbles yet, leave the culture for another day or two.
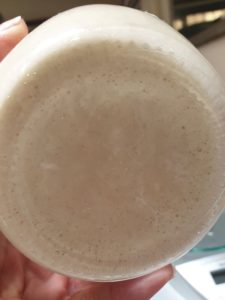
Creating a starter
- If your culture is bubbling and there is a distinct smell, you can feed the culture by discarding half of it and adding 25g of new flour and 25g of water. Mix together and let it sit covered for 24 hours.
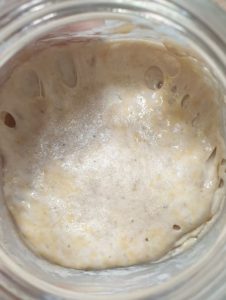
- Continue feeding the starter in the same way every 24 hours (at roughly the same time every day). You do not always have to discard half of the starter, but if there is any crust, darker layers or liquid in the starter, discard that before feeding it with new flour. You can also move the starter to a plastic container with a lid at this stage. Once your starter regularly bubbles up after feeding, you do not need a see-through container anymore and it's easier to feed the starter in a plastic container.
- Establishing your starter takes quite a few days and the concoction in the jar might look and smell dubious. Just push through and keep on feeding it! My starter tends to have small bubbles, get very thin and smell very sour from day 4. If your starter smells very acidic, it is "hungry" and needs more flour. You can feed the starter twice a day if you have this problem. Your starter is a unique culture of the natural yeast and bacteria in your environment. Starters tend to have some hiccups along the way. I was very worried when my starter smelled like something someone has sicked up, but just keep on discarding some of the starter and feeding it regularly, and it should pull through. If you are unsure ask me or Google your starter's symptoms. There are many resources on the internet. I used theKitchn.com when I first made my starter.
- Once you have established the starter you will see that when you have fed it, it makes lots of bubbles and rises up in the jar and then settles down again. As the starter matures, this activity becomes more predictable. It will also have a more healthy smell as it matures. More like a pleasant sour milk smell. My 15-month old starter smells like beer!
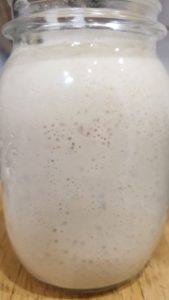
- After about 7 days of feeding your starter daily, it should start doubling in volume once fed. This indicates it is getting to the point where it can be used for baking. You can test if your starter has matured by doing the float test. After feeding your starter, watch for it to rise to it's highest level (you should have an idea where that is if you have watched it for some days). At this point, take a teaspoon of the starter and drop it into a cup with water. If the starter floats on top, you have lots of gas in your sample and it is ready to use.
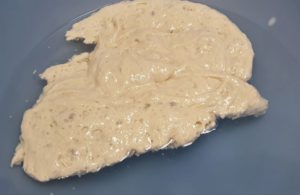
Maintaining your starter
- Feeding a starter every day for a month is time consuming and uses a lot of flour. If you are not going to use your starter daily (who of us do that!) you can feed it and place it in the fridge. I would suggest switching to a plastic container with a tight-fitting lid. The colder temperature will retard the fermentation and it can go without being fed for about a week. If you are on holiday, away on business, or an occasional baker, this is the way to go. You can also freeze the starter if you are unable to feed it for an extended time.
- If you are home I would suggest removing the starter from the fridge once a week and feeding it. Discard half of the starter and feed with equal parts flour and water. Mix and put back in the fridge.
- When you want to use the starter to bake, remove it from the fridge 2 to 3 days before you need it. Let it come to room temperature, discard half the starter and feed it with equal parts of flour and water. Divide into equal parts, and put half back into the fridge as your parent starter. Feed the other half for 2 to 3 days until it passes the float test. Then you can make your leaven and bake bread!
- I very quickly got addicted to this form of baking and started baking all the bread we use at home myself. I bake about 3 loaves of sourdough every Friday. Because I bake with it weekly my starter is very active and I don't need to feed it for days before I use it. This means it doesn't have a very sour taste. I take my starter out of the fridge on Wednesday evening. On Thursday morning I make leaven for my bread and feed the parent starter and put it back into the fridge for the next week. The leaven is made by putting about 2 tablespoons of starter in a clean plastic container. I add flour and water in equal amounts to make up the amount of leaven I need (eg if I need 300g of leaven I use 2T of starter, 150g of flour and 150g of water). I cover that and let it sit on the counter for 5 to 6 hours. Once it passes the float test I use it for my bread dough - usually by about 15:00 on a Thursday.
Acknowledgements
I have used various resources to guide me through making my own starter and baking sourdough bread. As mentioned in previous posts, I attended an Artisan Bread Baking course with Crust and Crumb. Although the course I attended was for yeasted bread, I am a member of the Crust and Crumb Facebook group where I get tips and information on baking sourdough from Nathan and Dominique, as well as the other members. My brother was also a big help as I got tips and encouragement from him while cultivating my starter. He got daily WhatsApp pictures and had to assure me that I was not creating anything toxic. When I already had an established starter I bought Chad Robertson’s book Tartine Bread and I have used that extensively for recipes and tips. I also used his guidelines on making a Sourdough Starter for this post.
Leave a Reply